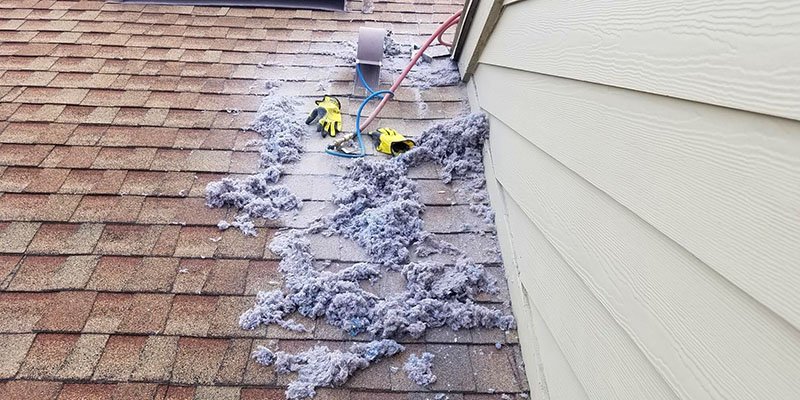
Cleaning your dryer vent, especially when it’s located on the roof, is crucial for the safety and efficiency of your home. A clogged dryer vent can lead to fire hazards and reduce the performance of your dryer. In this guide, we’ll walk you through the process of cleaning the dryer vent on a roof.
Process of Cleaning Dryer Vent on a Roof
To effectively maintain and clean the dryer vent on your roof, it’s important to follow a detailed process. Here’s an extended guide on each step to ensure thorough cleaning and maintenance:
1. Preparing for the Task
Before starting, prioritize safety and efficiency:
- Use a sturdy ladder: Ensure it’s stable and properly positioned against the roof.
- Wear gloves: Protect your hands from sharp objects and lint.
- Gather tools: A screwdriver for opening the vent cover, a vent brush kit for cleaning, and a vacuum with a long hose attachment for removing lint.
- Safety support: Have someone nearby to hold the ladder and assist in case of any unforeseen issues.
2. Inspection and Access
Properly inspecting and accessing the vent is crucial:
- Locate the vent: Find your dryer vent outlet on the roof. Make sure you can access it safely with your ladder.
- Remove the vent cover: Use the screwdriver to carefully remove the cover. This will give you access to the duct for a thorough inspection.
- Check for blockages: Look inside the vent for any visible lint accumulation or obstructions that could impede airflow.
3. Cleaning Process
Thorough cleaning is essential for preventing risks and ensuring efficiency:
- Manual Cleaning: Start with the vent brush, inserting it into the duct. Gently but firmly scrub the sides to loosen the lint and debris. Move the brush in and out several times to cover the entire length of the vent.
- Vacuuming: After loosening the lint, use the vacuum with its long hose attachment to suck out the debris. Make sure to reach as far into the duct as possible, moving the hose around to capture all the loosened lint.
4. Finishing Up
Ensuring everything is in order after cleaning is vital:
- Inspect the vent: After cleaning, look through the vent again to make sure it’s completely clear.
- Secure the vent cover: Replace and securely fasten the vent cover to prevent any leaks or entry of animals.
- Test the dryer: Run your dryer for a few minutes to ensure the air is flowing properly through the vent.
5. Regular Maintenance
To prevent future problems, regular maintenance is necessary:
- Schedule cleanings: Clean your dryer vent every 6-12 months, or more frequently if you use your dryer extensively.
- Stay alert to warning signs: If drying times increase or you notice unusual smells, check your vent immediately.
To learn more about Superior Air Duct Cleaning San Antonio visit our site or call us right now.
Table: Dryer Vent Cleaning Checklist
| Step | Task | Notes |
| 1 | Safety Preparations | Gather tools, secure the ladder. |
| 2 | Inspection | Check for visible lint and damage. |
| 3 | Manual Cleaning | Use a brush to loosen lint. |
| 4 | Vacuuming | Remove loosened lint with a vacuum. |
| 5 | Finishing Up | Replace the vent cover, test the dryer. |
Superior Air Duct Cleaning San Antonio
After cleaning your dryer vent, you might consider a professional inspection to ensure everything is in top shape. Superior Air Duct Cleaning San Antonio specializes in thorough cleaning and maintenance of air ducts and dryer vents, ensuring optimal performance and safety. Trust us to keep your home safe and efficient.
FAQs
Q: How often should I clean my dryer vent?
A: Cleaning your dryer vent should occur every 6 to 12 months. Regular cleaning prevents fire hazards and ensures your dryer works efficiently, saving energy and reducing drying times.
Q: Can I clean the dryer vent myself?
A: Yes, you can clean the dryer vent yourself with the right tools and safety measures. However, for thorough cleaning and safety, professional service is recommended.
Q: What are the signs of a clogged dryer vent?
A: Signs include longer drying times, overheating, visible lint outside the vent, and a burning smell. If you notice these, inspect and clean the vent immediately.
Q: What tools do I need for cleaning a dryer vent on the roof?
A: You’ll need a ladder, gloves, screwdriver, vent brush kit, and a vacuum with a long hose to effectively clean the dryer vent on the roof.
Q: Is it dangerous to have a clogged dryer vent?
A: Yes, it’s dangerous because lint buildup can lead to fires. It also decreases efficiency, increasing drying times and energy costs.
Q: Should I inspect the dryer vent after cleaning?
A: Yes, inspecting the vent after cleaning ensures it is completely clear of lint and blockages, guaranteeing the safety and efficiency of your dryer system.

